I love the look of two nightstands on each side of the bed. I wanted to have this in our spare bedroom that we are decorating, but I didn't want to spend too much money since this room is primarily used when guests come in town to visit. We were able to find some nightstands from a garage sale for $7 each, and instead of painting them a darker color or restaining them, I decided that I wanted to paint them white and give them a nice, clean look.
I have never painted any furniture white, so I wanted to make sure that I did it right the first time. There are many blogs on painting furniture, and I was able to find directions on a blog called, Young House Love, that I have fallen in love with and encourage you to check out as well by clicking here.
To start off, one will begin by sanding the furniture to get rid of any clear finish that is on it. I used sand paper that we had in the house, which was around a 150 grit. I wouldn't use anything greater than a 120 grit or less than a 220 grit. It is just the finish that needs to come off, not the stain.
The next step would be to clean off and dry with a towel the dust created by the sanding. After that, a Kilz oil-based priming coat should be applied to the furniture. This will ensure that none of the stain that is on the furniture will leak through to the top coat. I applied two coats of Kilz to make sure that it was covered, but it still wasn't an even coat on the surface. One should at least allow a couple hours between coats. I also used a small, foam rolling brush to apply all coats, and another foam brush to get the edges and corners.
Now, onto the white paint. I brought home so many color cards of white paint to make sure that I was getting the right shade of white. If you are trying to match the color to another white piece of furniture or your baseboards, it's a good idea to bring these home to compare and match as close as possible. Once a color is chosen, the color should be mixed into a latex, semi-gloss paint so that it has a durable finish that can be wiped clean. Apply two or three coats of the paint to the funiture, letting it dry between the coats, until you have an even coat over the entire piece.
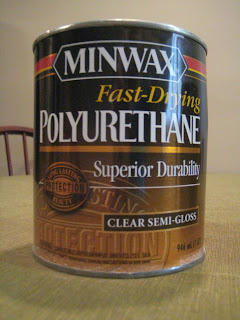
Finally, one will want to apply a finish coat for that added protection and glossy look, in which I used a water-based polyurethane "protective finish" in clear gloss. I asked the associate at the hardware store which finish provided the most protection, and he suggested one with "superior durability". This will allow items to be set on the furniture and not scratch the surface or allow it to be cleaned. I applied 3 coats of this to the nightstands.
I also decided to update the hardware on the nightstands to make it fit into the decorations of the rest of the room.
So, to sum up the steps:
Step 1: Sanding - 150 grit
Step 2: Oil-Based Kilz Primer - 2 coats until covered
Step 3: Latex, Semi-Gloss Paint - 2-3 coats
Step 4: Water-Based Polyurethane with Clear Finish - 2-3 coats
One can expect to spend around $10 per quart of paint that is purchased. So, I spend another $30 on the primer, paint and finish coat, but I do have a bunch left over for another project in the future.
Sunday, August 26, 2012
Subscribe to:
Post Comments (Atom)


No comments:
Post a Comment